LaurasPills

LaurasPills

sabato 30 aprile 2016

diy nail polish with glitter sparkles


Hello!
Today I would like to show you a different use of nail glitter sparkles dust. Born Pretty Store kindly sent me this product for a review.
As you can see from the picture this pruduct is far away from the common glitters but it's iridescent dust with flakes in different sizes.


I have chosen shade number 4. As you can see the flakes shift from white to light pink and blue if used over black (as I did in my middle finger nail). The container is tiny but you need a small amount of product, I can assure it will last long.

You can find this product at this link
http://www.bornprettystore.com/chameleon-nail-glitter-sparkles-dazzling-glitter-dust-p-24085.html

You can use my coupon code at check out to get 10% off 
RASX31 on www.bornprettystore.com


It's very easy to use glitters on nails, after you have applied a regular polish, dip your wet polish nail into the glitter pot and turn your finger from side to sideto ensure you get glitters on the entire nail, wait it to day add a top coat and...that's it!

But there are a lot of different things you can do with these glitters, you can apply them with a brush for a degradè effect or you can create a nail polish with glitters!
You can simply add them to a regular polish for a sparkling chameleon effect.

I decided to create my own shade using a matte base from Kiko and mixing different shades. I used pastels colours. I wanted to be quite sheer. The flakes give a wonderful frosting effect to the shade. Since it has a sheer and shimmer effect you can use it as a top coat on darker colours too.


One last suggestion: I made a funnel with a piece of paper, in this way it's easier to pour the dust in the polish bottle and you won't waste the product.


This is how the shade looks on nails. On the middle finger I jus used the glitter over a black polish.


I wanted to add a glam touch to this manicure so I added some mini rhinestones 3D decorations, there are 4 sizes available, I received the smallest ones. They are very unique, they have a beautiful shine they are iridescent so the colour changes depending on light reflection.


You can find this product at this link
http://www.bornprettystore.com/10pcs-mini-rhinestone-nail-decoration-flatback-shining-studs-nail-p-20707.html


I hope you enjoyed this post!

Laura

venerdì 22 aprile 2016

Purple rain and feathers on nails!


Hi there!

I wanted something colourful for spring. My main inspiration was the song Purple Rain. I wanted to add also this wonderful sheet of  tranfer decals from Born Pretty Store. There are four different shades, one in green and yellow, or pink and coral,  blue and petrol, purple and blue. Of course I got the last one! Purple is my favourite colour!
The sheet is quite big so you can use the decals for a lot of manicures. Moreover the feathers are very detailed and come in different stiles and sizes.
You can find them at this link http://www.bornprettystore.com/sheet-colorful-feather-nail-water-decals-transfer-stickers-hn053054055056-p-24095.html

You can use my coupon code at check out to get 10% off 
RASX31 on www.bornprettystore.com


They work as any water decals.

Once you have cut the design you have to remove the plastic top.
This step is very important because if you don't remove the plastic film you will have an unusable water decal.
Soak the piece of the pattern in water for few seconds, then you can slowly slide the decal off the paper backing. It isn't sticky so you have a little bit of time to place it on your nail.
Place it on the nail, smooth the surface and be careful, you might create some air bubbles. It's a good tip to dab the eccess of water with a tissue (or you can blow dry).
Seal the design with a clear top coat.
You can cut the eccess of the decal with some scissors or remove it carefully with a small brush and some nail polish remover.


For those who aren't that talented with freehand art, they are a lifesaver.
The designs are very delicate and the the colours are light so in my opinion they will work better on light and medium shades.

I wanted to add another touch of colour so I decided to do a watercolour effect mixing some pink, purple and light blue nail polish and some alchool, I gently blends the shade on the nails. It looks like water drops or purple rain on nails.

I hope you liked this nail art!

Thanks for reading

Laura


giovedì 21 aprile 2016

Light blue and embossed gold decoration


Hello!
it's nail mail time today! The site Born Pretty Store sent me some wonderful products to try, give my honest opinion and review for you.
The first products that I would like to mention is a sheet of embossed stickers in gold.
I chose a flower pattern number 53 .
You can find it a this link http://www.bornprettystore.com/sheet-embossed-texture-stickers-gold-silver-flower-grid-pattern-nail-stickers-decals-p-23155.html
or with the ID # 23155.
You can use my coupon code at check out to get 10% off 
RASX31 on www.bornprettystore.com


These are quite different from the others stickers you might find elsewhere because you get a large sheet and you can trim and select the area you want on your nails.
The design is quite detailed the sticky part is trasnparent and the decoration in relief is in a beautiful gold.
They are quite easy to use since they are self adhesive, you can apply them directly onto your nails over a layer of well dried nail polish and the seal with your favourite top coat. You must be careful to apply the stickers flat otherwise it will chip.


This nail art is an example on how you can turn a simple manicure to a sophisticated nail art with simple steps. This sitcker can look good with both light and dark colours.
As base I used an indie polish brand by Parrot Polish in the shade Exclusive Joyful. I received a collection of their nail polishes as a contest prize in collaboration with Scra2ch. I will write about the experience in another post!


Thanks for reading!

Laura

venerdì 19 febbraio 2016

Ehi guys! Check out my elegant feather nail art tutorial for @nailitmag 

http://www.nailitmag.com/nail-art-how-to-elegant-feathers/

Elegant feather nail art


THINGS YOU NEED:


-      Kiko 3 in 1 matte base
-      Pupa Lasting color sheer white
-      Barry M Silk nail paint in Pearl
-      Barry M Royal Glitter collection in Lady ( sparkling glitters nail polish that looks like snow)
-      Barry M Royal Glitter collection in Duchess (sparkling glitters rose/pink undertone with silver glitters)
-       striping thin brush
-       make up sponge


STEP 1:


After using a clear base for all of your nails, start by painting your index and ring finger with the sheer white nail polish. Paint the other three nails with the Barry M silk white. This particular polish has a beautiful silk sheen, the white is pearlescent and almost matte. You can achieve a similar effect with an iridescent white and a matte top coat.


STEP 2:


After the base colour is dry, apply a mix of Barry M glittery nail paint in Lady and Duchess on the corner of a make up sponge. Dab the sponge from the cuticle area to the free edge. Repeat this step until you create a delicate gradient effect.


STEP 3:


Now it’s time for the feather design! With a striping brush and a white nail polish draw a simple curved line from the cuticle to the tip.


STEP 4:


 Start building the shape of the feather with some light strokes on each side of the line. You don’t have to be too precise, fill the gaps to create a feather-like effect.  Repeat the design on the ring finger, you can vary the position of the feather as you like.


STEP 5:

To enchancethe design I used the Barry M glitter nail polish in Duchess and placed it along the shaft of the feather. Don’t forget to seal your design with a top coat.


lunedì 15 febbraio 2016

Graffiti nail foil!


Hello again!
While seaching for holo/shattered/glass foil I have tried many many foils!
The one that I used in this nail art is from Born Pretty Store , I have n 165, this pattern has a marble/rainbow effect it is iridescent and beautiful. The foil is almost a 1 m long and 4 cm wide.

You can use my coupon code at check out to get 10% off RASX31 on www.bornprettystore.com


This kind of foil is meant to cover the whole nail with a special glue for foils. I have one fro Ciatè but I found it very tricky to use so I applied it only on the middle finger.

 For the rest of the nails I went for a graffity/distressed look easier to achieve. You can use a normal clear nail polish, you can apply one coat over the colour you want and when it is almost dry (it has to be a bit tacky) you press the foil onto the nail, rub a bit and remove quickly the foil. Some random pieces of foil should be on your nails.

As base you can use any colour you want but I prefer dark shades with this kind of foils.


I hope you'll like the result!
Se you soon!

Laura

martedì 2 febbraio 2016

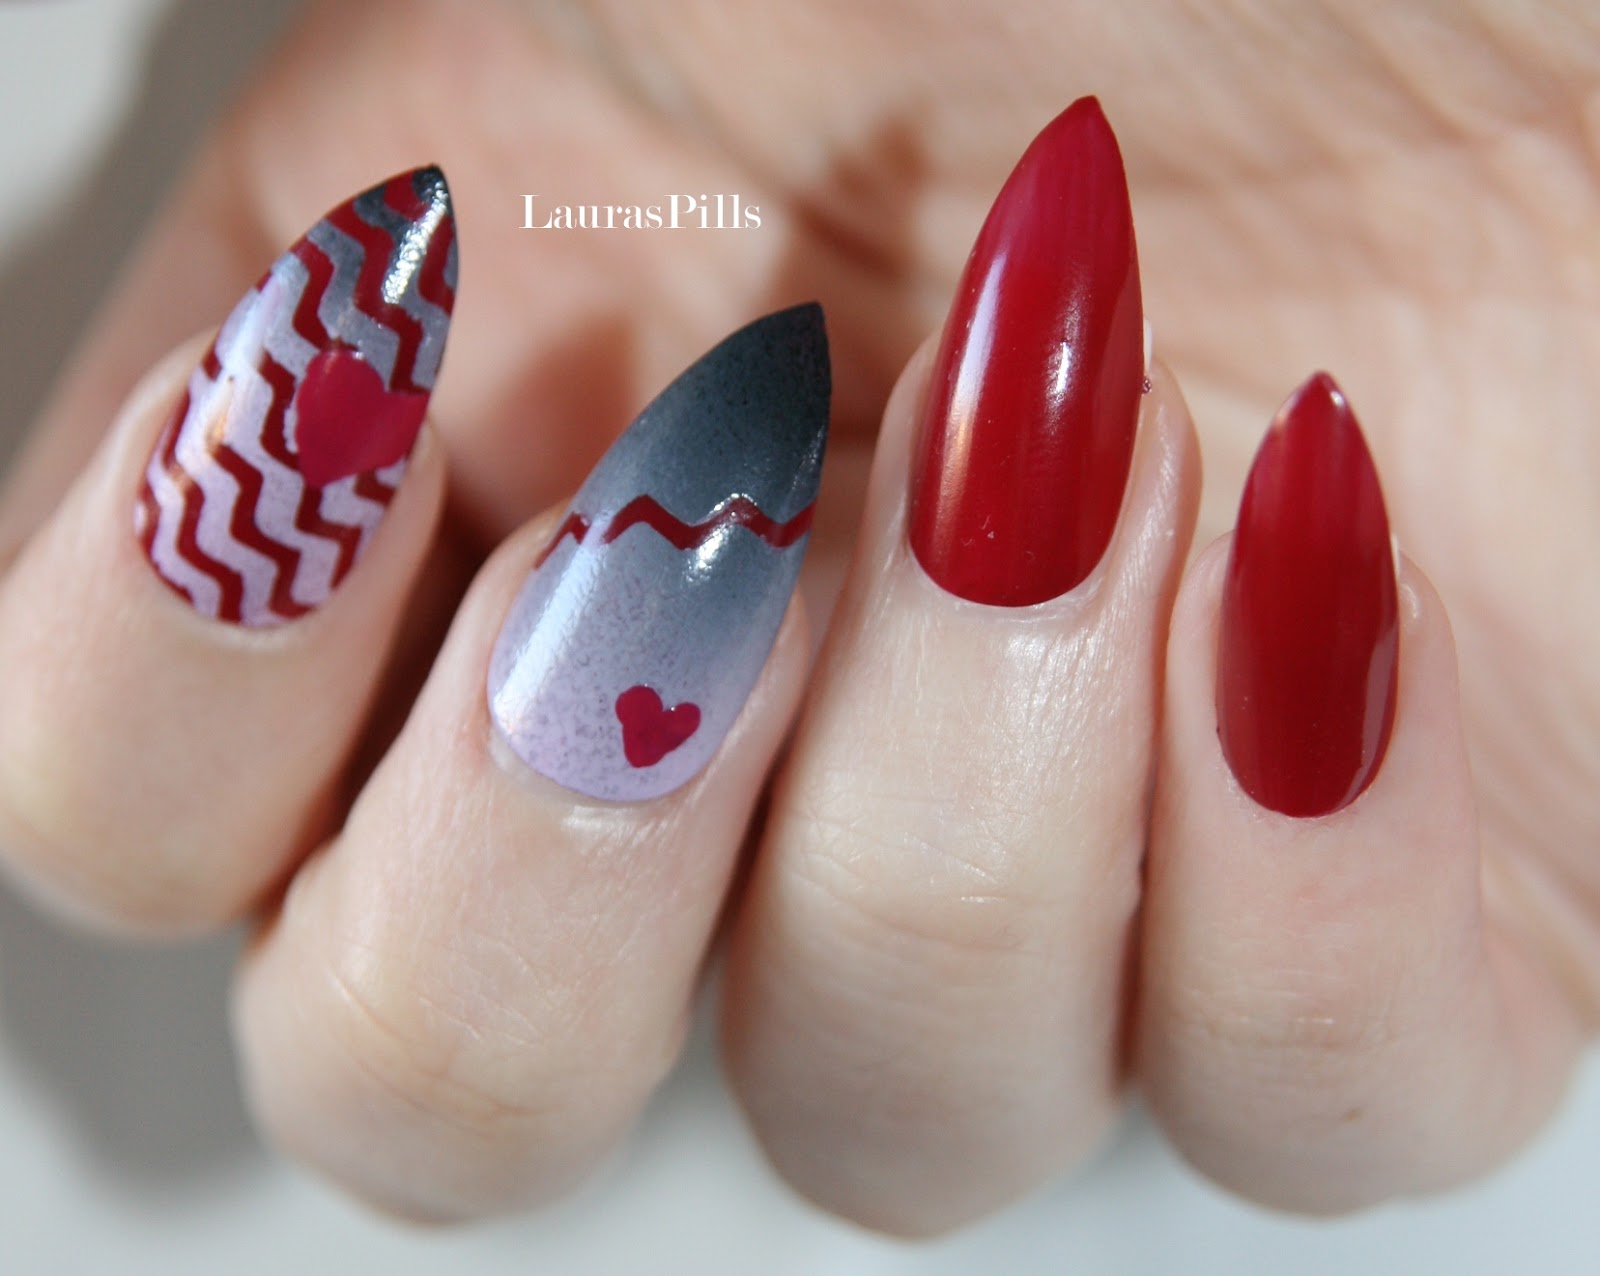
Valentine chevron nail art!

Hello!
It's me!
Valentine's day is just around the corner so I decided to do something love-inspired.
If you don't have time you can go for a classic red/burgundy nail polish but wanted to enrich it with some details.


For this nail art I used a chevron nail striping tape Born Pretty Store sent me.


The tape roll is self-adhesive and the strip is divided in 3 parts. You can use all of them for different results.
I find it so clever that it comes in rolls, it is different from others nail vinyls, you can trim the lenght you want and minimize any waste. you can select small pieces for your pinky or longer ones if you have long nails and want to use it vertically.

the product is very vesatile because you can use it as a sticker, you can apply it directly on the nail and seal it with clear top coat. You can use it also as a vinyls or stencil as i did in this nail art.


Tutorial:
Start by painting all of your nails with a burgundy polish. Make sure you leave it dry completely.
Take the nail chevron tape and apply it on the nail. (I applied some pieces sidelong on my index, one on the middle and three on the thumb).


Take a pink and a black nail polish and using a ake up sponge dab onto the nail on the top of the vinyls. In this way you can create a soft degrade.


Remove the vinyls with some tweezers while the polish is still wet.


As last step I painted some small hearts with a dotting tool.


As you can see the nail vinyls worked perfectly, the nail paint didn't smudge too much and the effect was great.
You can choose between 5 colours: gold, silver, blue, white, black, red.
Check their site
http://www.bornprettystore.com/chevron-nail-striping-tape-colorful-nail-tape-line-stickers-lines-p-23383.html

You can use my coupon code at check out to get 10% off RASX31 on www.bornprettystore.com

Write me a comment if you ever tried something similar!
Thanks for reading.


Laura


lunedì 1 febbraio 2016

Shattered glass nail trend!


The shattered glass nail art is a big trend started in Korea by the famous nail artist Unistella.
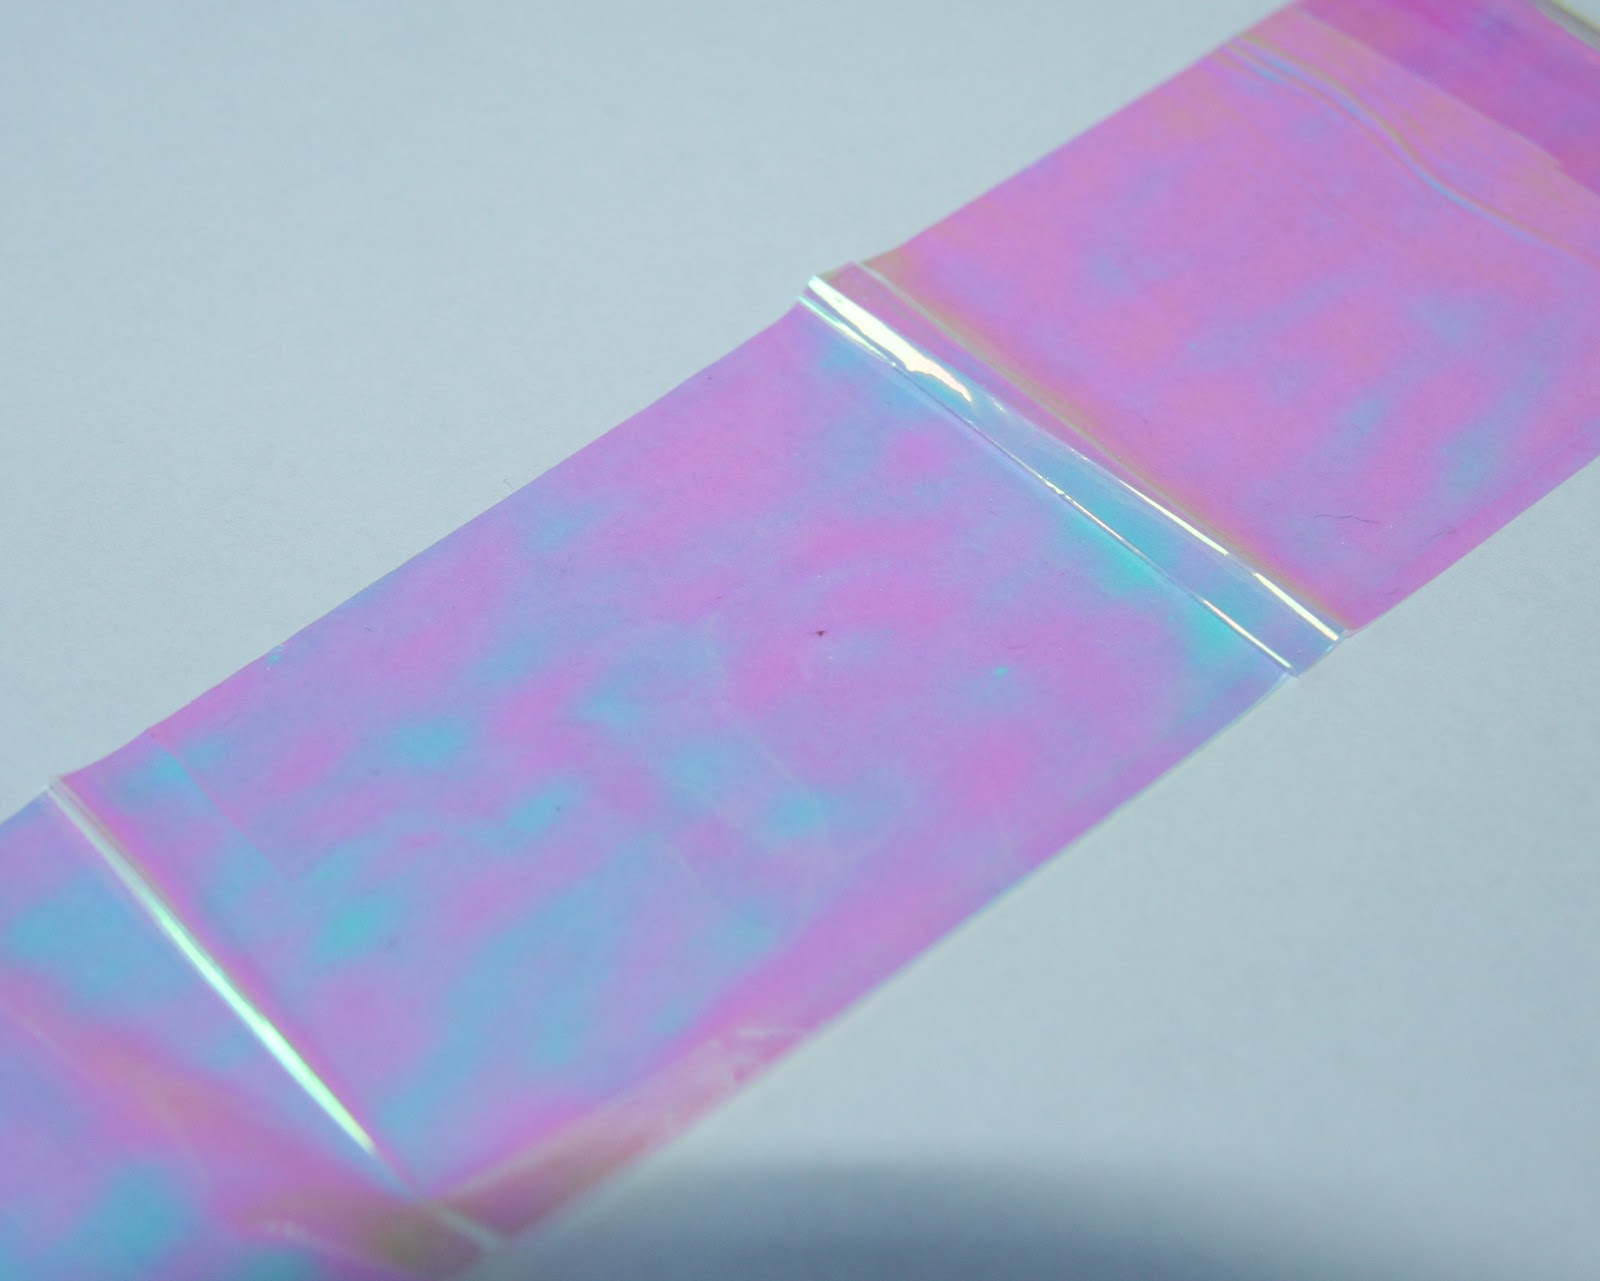
This nail art is quite easy: segments of an iridescent cellphane or foil are placed directly on a wet nail polish and sealed with a top coat.
I have been looking for this special foil everywhere in Italy, but it was impossible to find in local stores.

The one that I used in this nail art is from Born Pretty Store  , they were so kind to send me this item.
This particular cellophane reflects light like facets on a gemstone or a broken glass.
In the site you can choose between 5 colours, I have shade number 2.
Here is the link of the product:
http://www.bornprettystore.com/shiny-laser-nail-foils-holographic-foils-nail-transfer-sticker-paper-p-23540.html

You can use my coupon code at check out to get 10% off RASX31 on www.bornprettystore.com


It's really hard to describe this beautiful shade, it is an iridescent and pearlescent pink and the colour changes a lot with different backgrounds.

In this first example I used it on a black nail polish. As you can see the sheer foil shift from light to dark green, blue and golden yellow, the colour change is based on the light (natural or artificial) and the way you decide to layer the stickers.


Here is a short video that show you how bright and iridescent this foil is.


I made this other version on a sheer pink nail polish, in this case the result is very delicate and the shades shift from golden yellow to pink and light green.


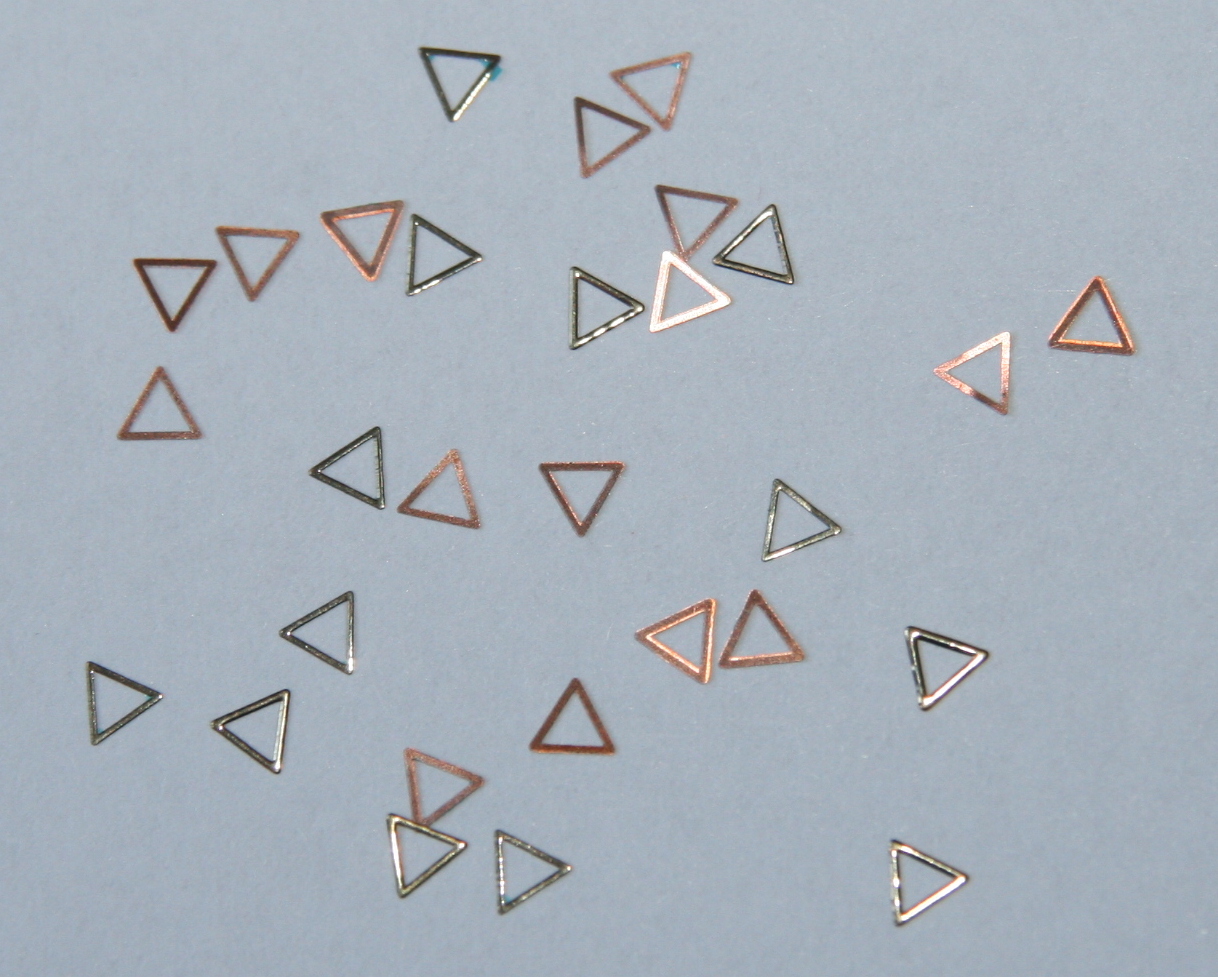
I've decided to add some golden decoration triangles. These decorations are ultrathin and very easy to apply on wet clear nail polish. They are quite flexible so they easly bent on the curve of the nail. For a long lasting manicure you can seal the design with a clear top coat.
There are some other shapes available in the Born Pretty Store.


I hope you'll like my nail art idea!
Talk to you soon

Laura