LaurasPills

LaurasPills
Visualizzazione post con etichetta best nail blogger. Mostra tutti i post

lunedì 16 luglio 2018

Warm toned leaves! Water decals from Nicole Diary


Hello!
 I was excited to receive an email from Nicole Diary a few weeks ago asking if I would be interested in reviewing products for them. I gladly accepted their invitation and selected  some products from their site  www.nicolediary.com.
NICOLE DIARY is a fashion-based nail art brand founded in 2011 by "NICOLE", she believes that"creativity is the key note of all perfect nail arts". They offer free shipping worldwide and prices and products quality seems to be excellent.

It takes 2 or 4 weeks but the shipping time depends on your country.

The first item I would love to show you is this sheet of water decals.
I was really surprised by designs and the unsual colour palette. The decals show some flying leaves in all warm tones such as orange, brown, caramel, mustard yellow, green.


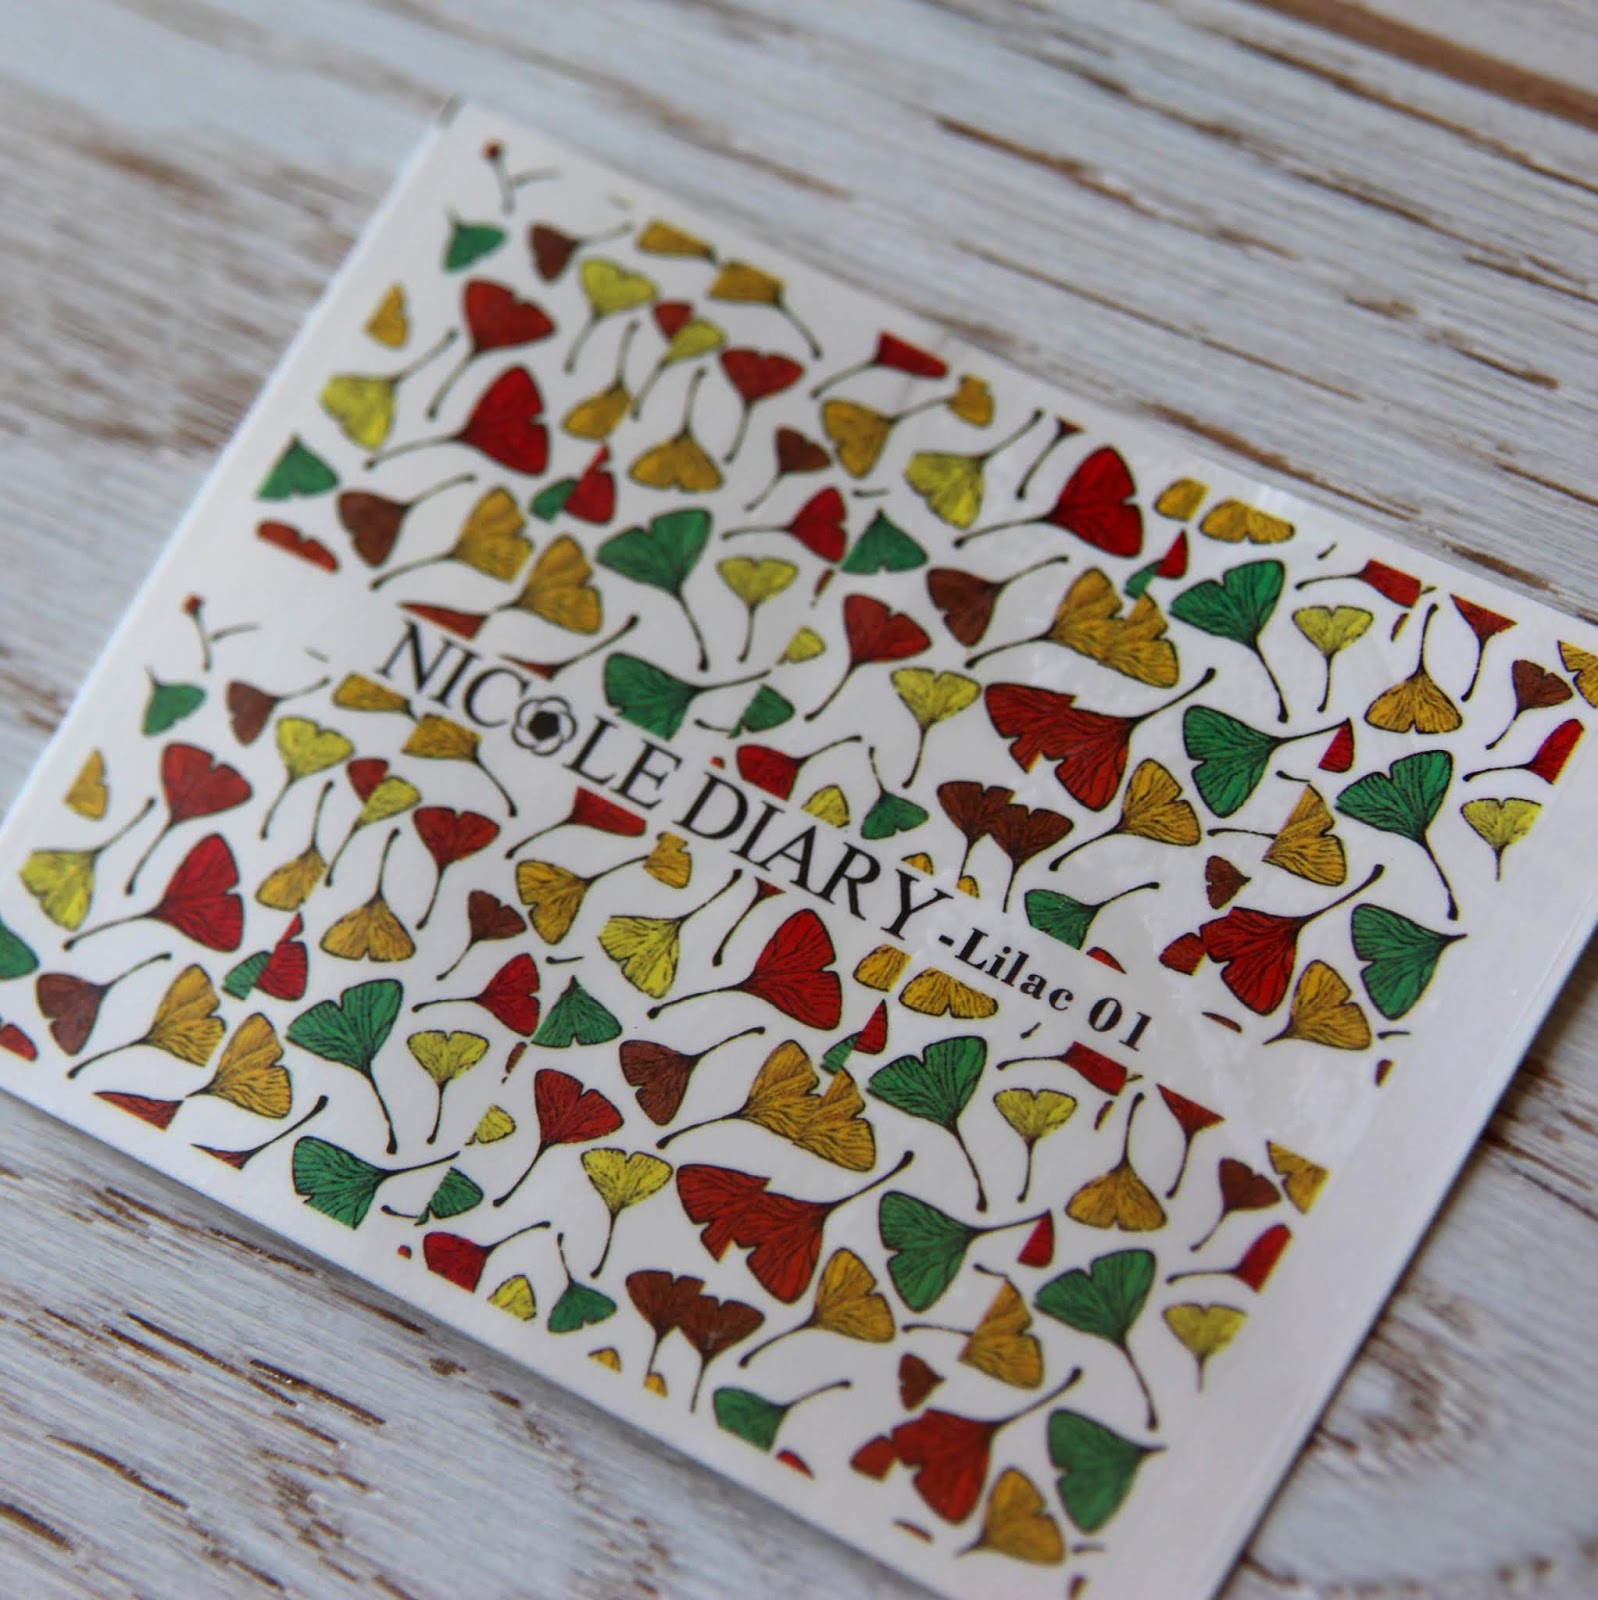
The design print is perfect, printed in hight resolution, lines are very sharp and colour are vivid. I am a huge fan of water decals in general! They are super easy to use and you can spice up your nails instantly with intricate looking designs. They are also a great alternative to stamping when you want a professional look in a few minutes.

The size of the sheet is approx. 6.5cm x 8cm.
 One sheet always comes with 10 designs on it. There are four different sizes, so you can choose the one that fits your nail best or use different ones on different sized nails.
The decals come with some instruction on the backs, which is great when you are using them for the first time.

You can find this set of water decals here:
http://www.nicolediary.com/nicole-diary-nail-water-decal-colorful-leaf-sticker-nail-tips-decoration-lilae-p-121.html

Don't forget to use my coupon code for 10% off LAPI10 on www.nicolediary.com
There is a wide range of water decals and designs, I am sure you will find the right one for you.


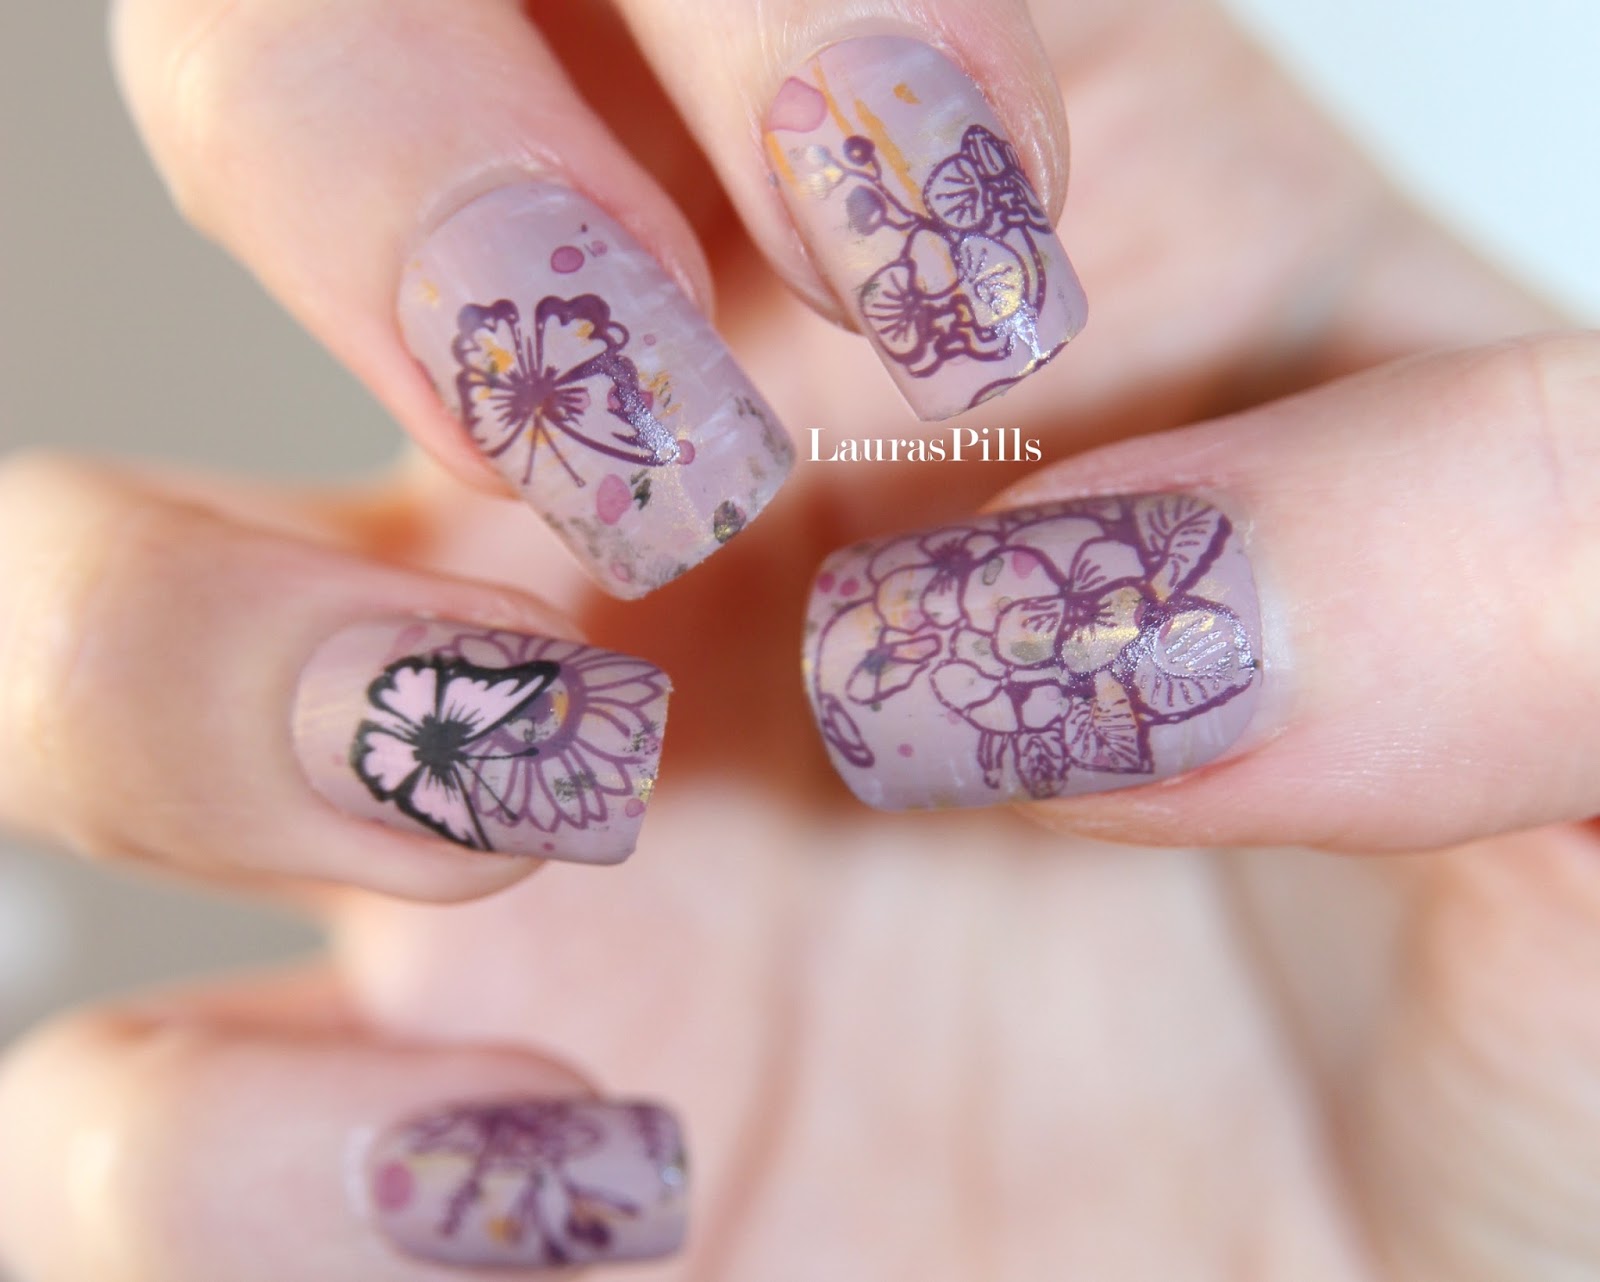
 The coloured decals work best over white so I started with a base of a white plain nail polish.
The application is very easy.
The waterdecals are protected by a transparent sheet. You can select the size and the design you want, cut it with a scissor. Don't forget to remove the plastic sheet. Cut out the section of decals, and let it soak in room temperature water for about 15-30 seconds, slide the decals off the paper backing with tweezers and place on the nails with the white or nude base coat
The instructions suggest to place it on  the nail and dry with a tissue. The last step is to secure it with clear nail polish. In my case with a matte top coat.

You could use all 10 at once on all of your finger nails, or use them on accent nails as I did and make them last over a few manicures. I decided to pair the design with a warm tones red with some sparkling gold wire. This product is from Nicole Diary too, it will be reviewed soon in a a blog spot.


martedì 22 agosto 2017

Low poly nail art!


Hello!
How is your summer going? Today I have a brand new nail art to show you!
You all know I am obsessed over gometric pattern and they are my favourite in nail art!
So I end up picking stamping plates with these designs and I never get tired of them! So here is another wonderful stamping plate from Born Pretty Store.


 It is on sale now and you can have it for only 2.99. You can buy it at this link or search code # 39713
http://www.bornprettystore.com/born-pretty-stamping-template-geometry-figure-rectangle-manicure-nail-image-plate-l070-p-39713.html


 It comes in a beautiful paper sleeve and  measures (125x65 mm). It also has a plastic backing for easy, comfortable handling and a protective nylon screen.(It has to be removed before use).


The stamping technique is a huge help if you want to achieve a perfect geometric pattern, hand free drawing will be very difficult and time consuming.
This plate has so many options that I did not know where to start. It has 7  bigger pattern and the stamping plate offers an awesome array of  smaller 3D graphics and modern abstract designs .
This second half of the plate is very intersting because it replicate the "low poly" style:  is a polygon mesh in 3D computer graphics that has a relatively small number of polygons. This angular, faceted look will continue to show up outside the gaming world, in web and print projects, stationery and fashion. (A dedicated nail art will be coming soon).

In my opinion geometric patterns combine very well with bright and light colours. So as base I did a marble nails art with pastels colours.
This is before:

and after:

A great result with such a tiny effort. The options are endless with this plate.  The amount of designs are worth getting this plates, and they stamp beautifully. I was so surprised to see the intricate detail that is taken with each plate, and the entire design picks up very well.


You can mix and match different pattern as I did or just use one as an accent nails or a minimalistic style in monochrome.
I hope you like it!

mercoledì 31 maggio 2017

Secret garden nail art! Vintage flora nail art.


Hello!
Today I'm here to show a new nail art!
Few days ago I received a nail mail full of new item from Born Pretty store www.bornprettystore.com.
This stmping plate has inspired me immediately.


The packaging has a beautiful floral patter too.


Image Plate BPL-62


This plate is perfect for spring and summer.
I was amazed by the details and how it is deeply and well engraved so that the design will transfer perfecly on the nail.


 You can use my coupon code at check out to get 10% off RASX31 on www.bornprettystore.com


The designs are big enough to cover larger and longer nails but you can also select a small part of the image and stamp it on smaller nails,

I have a lots of plates with flower motif but I have never seen such a variety of spieces.
It has many flower species: cyclamen, hibiscus, daises, cala lily, daffodils, gladiols and roses.

Here is a small stop motion video


For this nail art I wanted to use all the designs available on this plate.
So I thought I wanted to give the effect of a vingtage nail art inspired by the book "The secret garden".


I started off with a dusty pink base nail polish on all nails and then I randomly added some staines and strokes in mauve, grey, and gold tones. I concentrated the colours on the edges of the nails so that it looks like aged ink and old paper.

I let it dry and I sealed it with a clear mat top coat. Then I stamped the flower patterns with a burgundy /mauve nail polish.


For some designs I did a reverse colouring technique: I filled some flowers and some butterflies with a light pink colour to add more depht to the designs.


Here are some pictures that show different solutions I tried on some fake nails.


I hope you'll like it!


Laura


sabato 30 aprile 2016

diy nail polish with glitter sparkles


Hello!
Today I would like to show you a different use of nail glitter sparkles dust. Born Pretty Store kindly sent me this product for a review.
As you can see from the picture this pruduct is far away from the common glitters but it's iridescent dust with flakes in different sizes.


I have chosen shade number 4. As you can see the flakes shift from white to light pink and blue if used over black (as I did in my middle finger nail). The container is tiny but you need a small amount of product, I can assure it will last long.

You can find this product at this link
http://www.bornprettystore.com/chameleon-nail-glitter-sparkles-dazzling-glitter-dust-p-24085.html

You can use my coupon code at check out to get 10% off 
RASX31 on www.bornprettystore.com


It's very easy to use glitters on nails, after you have applied a regular polish, dip your wet polish nail into the glitter pot and turn your finger from side to sideto ensure you get glitters on the entire nail, wait it to day add a top coat and...that's it!

But there are a lot of different things you can do with these glitters, you can apply them with a brush for a degradè effect or you can create a nail polish with glitters!
You can simply add them to a regular polish for a sparkling chameleon effect.

I decided to create my own shade using a matte base from Kiko and mixing different shades. I used pastels colours. I wanted to be quite sheer. The flakes give a wonderful frosting effect to the shade. Since it has a sheer and shimmer effect you can use it as a top coat on darker colours too.


One last suggestion: I made a funnel with a piece of paper, in this way it's easier to pour the dust in the polish bottle and you won't waste the product.


This is how the shade looks on nails. On the middle finger I jus used the glitter over a black polish.


I wanted to add a glam touch to this manicure so I added some mini rhinestones 3D decorations, there are 4 sizes available, I received the smallest ones. They are very unique, they have a beautiful shine they are iridescent so the colour changes depending on light reflection.


You can find this product at this link
http://www.bornprettystore.com/10pcs-mini-rhinestone-nail-decoration-flatback-shining-studs-nail-p-20707.html


I hope you enjoyed this post!

Laura

lunedì 15 febbraio 2016

Graffiti nail foil!


Hello again!
While seaching for holo/shattered/glass foil I have tried many many foils!
The one that I used in this nail art is from Born Pretty Store , I have n 165, this pattern has a marble/rainbow effect it is iridescent and beautiful. The foil is almost a 1 m long and 4 cm wide.

You can use my coupon code at check out to get 10% off RASX31 on www.bornprettystore.com


This kind of foil is meant to cover the whole nail with a special glue for foils. I have one fro Ciatè but I found it very tricky to use so I applied it only on the middle finger.

 For the rest of the nails I went for a graffity/distressed look easier to achieve. You can use a normal clear nail polish, you can apply one coat over the colour you want and when it is almost dry (it has to be a bit tacky) you press the foil onto the nail, rub a bit and remove quickly the foil. Some random pieces of foil should be on your nails.

As base you can use any colour you want but I prefer dark shades with this kind of foils.


I hope you'll like the result!
Se you soon!

Laura