LaurasPills

Visualizzazione post con etichetta red nails. Mostra tutti i post
giovedì 31 ottobre 2019
Elegant Halloween
Hello there!
Happy Halloween's Eve!
I feel I have already done many Halloween designs, the spooky night, the monster nails, zombie nails....this year I wanted something more sofisticated but still uncanny.
For this nail art I have decided to use this Born Pretty Store stamping plate. It is plate Texure L001 id code #46961 . It is a plate that is compltetely dedicated to marble designs. It is perfect to create an iper realistic marble veins desegn, or even opal or rose quartz or turquoise effect.
On the bottom part it has different marble pattern, in negative and positive so you can stamp on dark and light colours, it has also a design that mimic the water marble effect, so cool right?
On the top half it has a larger portion with singular marble veins and cracked lines, I think this part is meant to layered with different colours or colours with different opacity and pigmentation. Some marble veins are sheer and translucent.
In the mood for Halloween I used this wanderful marble plate to give the idea of veins and vessels.
I manly used the top part. I stamped over a clear fake nails with a pigmented red colour.
The I covered the entire nails with a glossy soak off top coat, then I painted the half of the nail with a dark red soak off polish from Mandam Glam, Queen of hearts. Then I secured the design with another layer of no wipe top coat.
mercoledì 6 marzo 2019
L'evoluzione del semipermanente! La Femme® Professionnel Base&Top Peel off compatibile con la linea Non-Stop-Color!
Ciao!
Da tempo sto cercando un'alternativa ai normali smalti che mi permettano una durata più lunga e che
siano di facile rimozione.
Essendo solo un'appassionata e non un'onicotecnica, mi sono avvicinata ai semipermanenti ma ancora temo di fare un passaggio completo, l'elemento che più mi intimorisce è la rimozione. Inoltre spesso sento l'esigenza di cambiare colore e sperimentare con diverse nailart, per cui una facile rimozione è un must nel mio caso.
Il brand La Femme® Professionnel ha proposto sul mercato un prodotto innovativo una nuova Base & Top Peel Off che permette di rimuovere lo smalto come una pellicola. Come suggerisce il nome questo prodotto funge sia da base che da top coat e da sigillante.
L'elemento sorprendente di questo sistema è che questa base e top coat è compatibile con tutta la linea Non Stop Color, una linea che unisce i vantaggi del semipermanente a quelli del gel. La gamma contiene più di 200 colori in due formule una classica e una HD , più densa, super pigmentata, e dalla stesura più facile perché autolivellante.
Le nuances disponibili sono molte, così come i finish, dal perlato al metallizzato, glitter, ci sono colori sheer o più coprenti in crema, ci sono anche dei colori termici che cambiano colore in base alla temperatura!
In caso gli oltre 200 colori non dovessero bastare questo brand propone anche nuove collezioni. L'ultima in uscita è Luna Park, selezione Primavera/Estate 2019 con sei nuovi semipermanenti dal finish metallico e i colori intensi.
Tutta la linea è 7-free ovvero priva di alcuni ingredenti dannosi per la salute come la formaldeide, resina di formaldeide, canfora, toulene, DBT, ethyl tosylamide e xilene.
I COLORI
Mi sono stati inviati tre colori di questa gamma e la base peel off.
Vediamo i colori :
Il primo è un rosso molto intenso, codice H178, è la perfetta tonalità di rosse né troppo calda né troppo fredda, quindi è un colore Rosso Valentino, un passepartout adatto a tutti i sottotoni di pelle. Con due passate sottili è coprente in quanto è parte della collezione HD che promette un colore pieno e rimane lucidissimo.
L'estremità del tappo della bottiglietta contiene una vera goccia di prodotto, un espediente molto utile per scegliere il colore desiderato e individuarlo facilmente nella collezione.
Il secondo colore è un nero H073 Black Shadow ,coprente in due passate, un nero puro; anche di questa colorazione ho apprezzato molto la lucentezza e la facilità di applicazione.
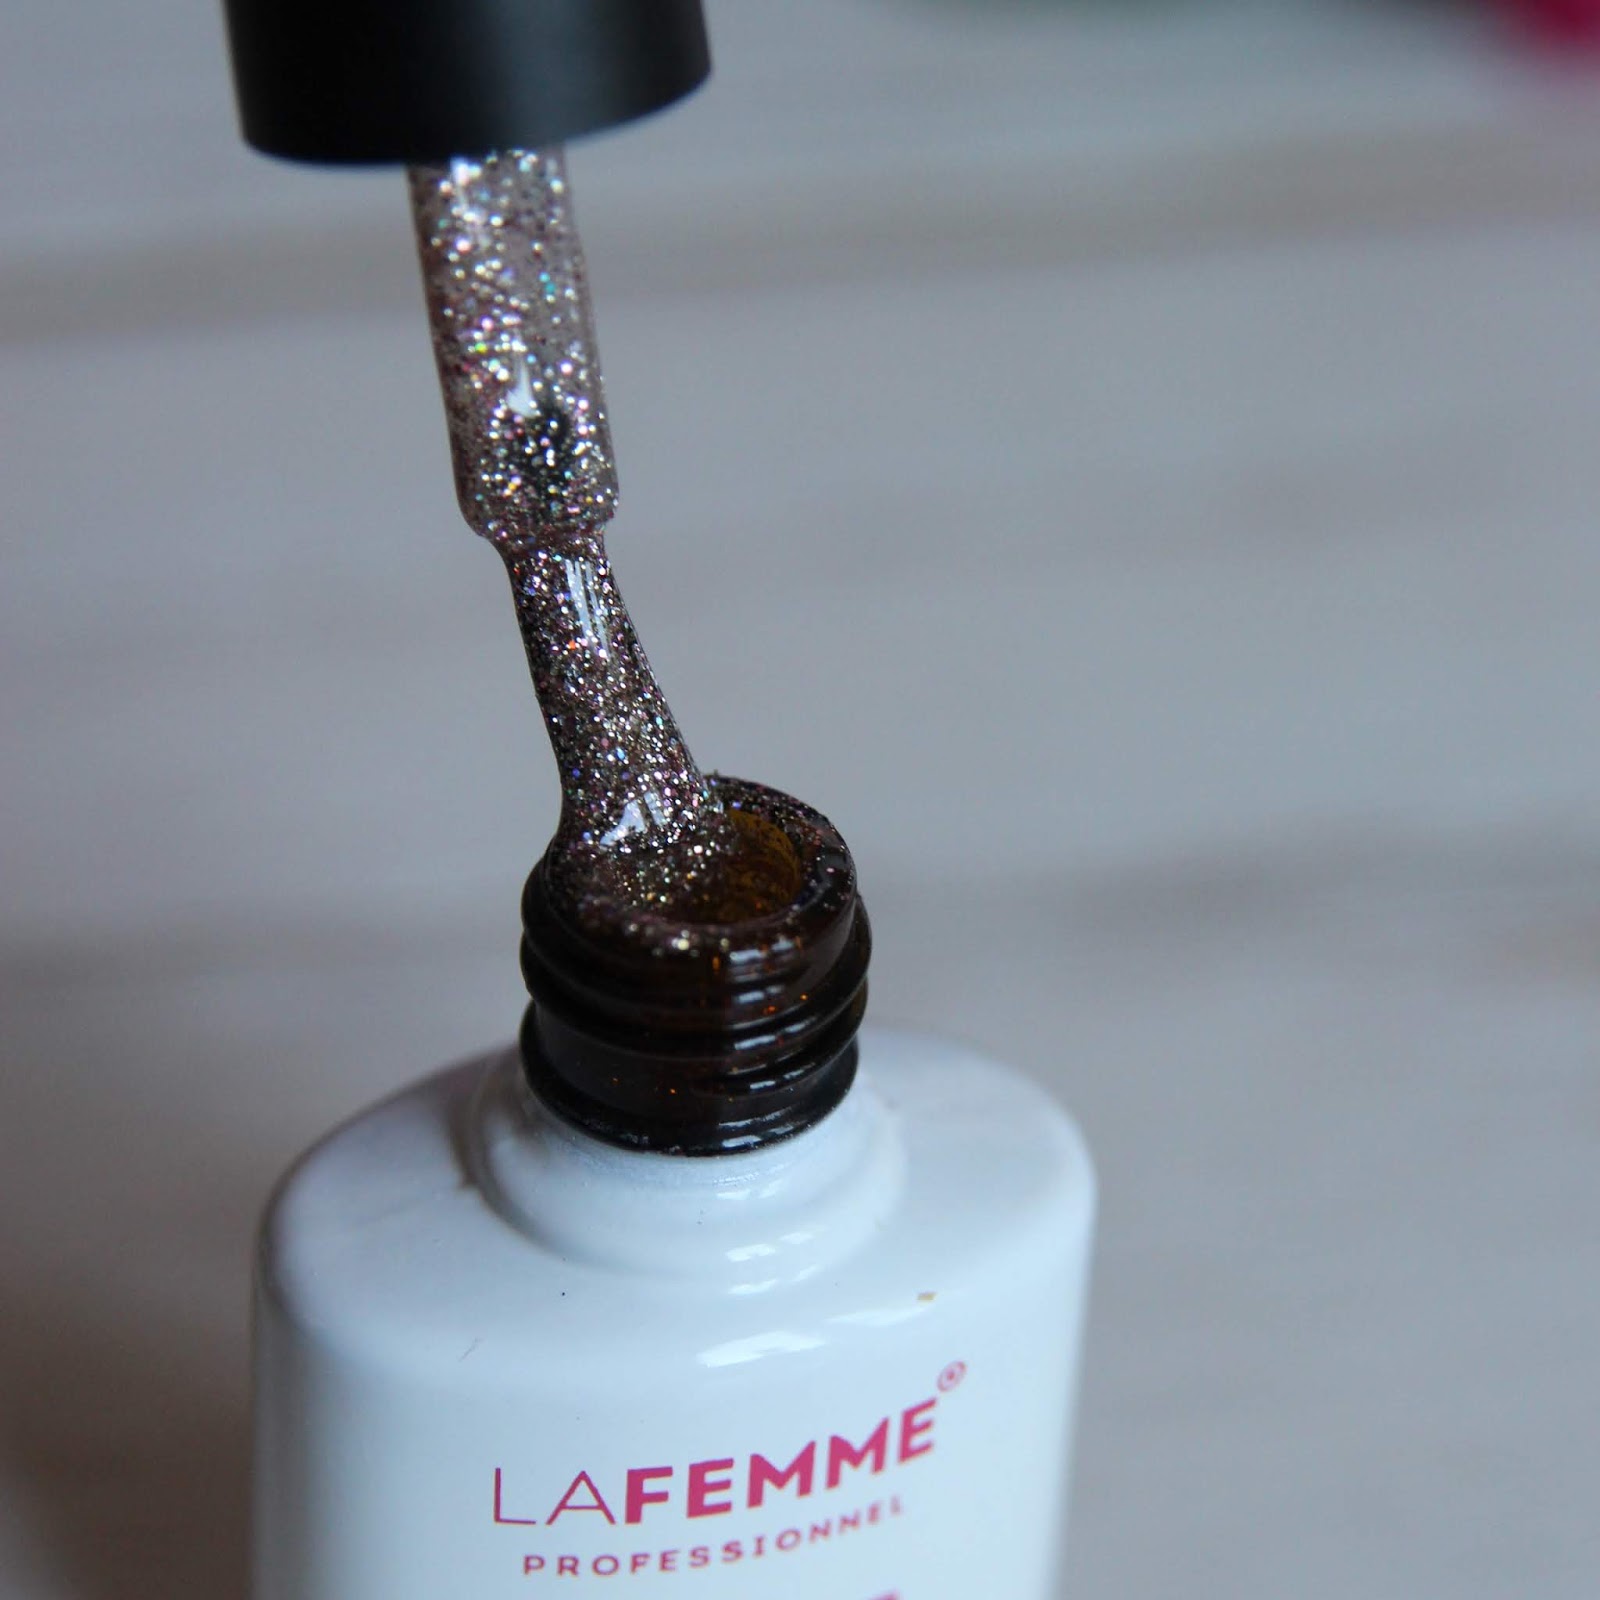
L'ultima colorazione fa parte della collezione natalizia dello scorso anno Falling Stars, ispirata alle stelle più brillanti di tutte le costellazioni, è il colore 220 Bellatrix, è una base trasparente con micro glitter in oro rosa e olografici. Si tratta di una colorazione molto attuale e può essere usata da sola o in combinazione con altri colori o per creare nailart come ho fatto io.
APPLICAZIONE:
Oltre ai prodotti già mostrati (ovvero alla Base&Top Coat Peel Off e un colore della linea Non Stop color) avrete bisogno di una lampada LED o UV, un prodotto per rimuovere lo strato dispersivo dopo la polimerizzazione.
Prima dell'applicazione ho fatto una semplice manicure spingendo indietro le cuticole limando le unghie sulle lunghezze. Le unghie devono essere perfettamente sgrassate ed opacizzate delicatamente con un buffer su tutta la superficie.
Il prossimo passo è la stesura della Base&Top peel off. Lo strato non deve essere troppo sottile in quanto sarà fondamentale per la crezione di un film su cui applicare gli altri strati e per la corretta rimozione. La base va polimerizzatta in lampada e il tempo di polimerizzazione per tutti gli strati varia dai 30 ai 60 secondi in lampada LED e 60-120 sec in lampada UV.
In seguito si procede con uno o due strati di colore, ogni strato andrà polimerizzato in lampada.
Quando si è soddisfatti della coprenza si può applicare un ultimo strato di Base&Top Peel off, farlo polimerizzare in lampada e sgrassare la dispersione con il prodotto apposito.
Ho trovato tutto il procedimento molto semplice, l'effetto di questo semipermanente è molto bello, ho apprezzato molto il finish lucidissimo, il risultato finale è leggermente più spesso di una applicazione di smalto normale ma ho sentito le unghie più protette da urti e graffi. Il fatto che tutte le formule fossero autolivellanti credo mi abbia aiutata molto in questa prima applicazione.
Ho anche avuto modo di usare questi colori come base per alcune nailart.
Qui ho usato degli stickers successivamente colorati di bianco sul colore rosso:
Qui sul colore nero ho tracciato una linea con il colore Bellatrix 220 con uno striping brush, un po' più larga alla base dell'unghia e più fine sulla punta.
Nell'ultima nailart ho usato la base glitter e in seguito ho applicato degli stickers floreali.
Questi semipermamenti sono adatti anche alle nailart, l'importante è terminare con un'altro strato di top coat. Li trovo particolarmente adatti con stickers e waterdecals in quanto lo strato sigillante è più sicuro e duraturo di un normale smalto.
DURATA E RIMOZIONE
Su di me questa prima applicazione ha avuto una durata di più di dieci giorni. Il colore è rimasto intatto, così come la lucentezza.
Una corretta applicazione e un'attenzione alla preparazione dell'unghia è fondamentale per la buona riuscita e per una buona durata, in particolare fate attenzione ad evitare di spingere il prodotto sopra le cuticole in quanto con la crescita naturale quella parte sarà più predisposta a sollevamenti.
Per quanto riguarda la rimozione, sul sito si consiglia di attendere almeno 10 giorni prima di rimuovere il prodotto.
Per aiutarvi a sollevare un bordo del colore, potete usare un bastoncino di legno d'arancio o uno spingi-cuticole, e procedere con calma fino a sollevare tutta la pellicola.
Ecco qui uno strato completamente "spellicolato"!
Una volta rimosso il prodotto potrebbe rimanere una piccola patina biancastra ma si tratta solo di un residuo della base che può essere rimossa passando delicatamente un buffer sull'unghia.
Spero che questo post vi sia stato utile!
Vi lascio il link diretto al sito ed alla pagina facebook e vi ricordo che iscrivendosi al sito si ha lo sconto del 10% e che è in corso una promozione dal 1 al 10 Marzo con il 20% di sconto su alcuni prodotti. Inoltre iscrivendosi alla newsletter si avranno aggiornamenti periodici sulle nuove collezioni in uscita e comunicazioni su offerte speciali. Il brand comprende molti tipi di prodotti smalti, gel , acrygel, semipermanente, nail art, prodotti cura unghei e cuticole, smalti, lampade e molto altro.
link sito: https://www.aleascosmetics.com/
link fb: https://www.facebook.com/groups/LaFemmeProfessionnel/
link insta: https://www.instagram.com/la_femme_professionnel/
Etichette:
flower nails,
Lafemme,
Lafemmenails,
Lafemmeprofessionnel,
nail blogger,
nailart,
nails,
NonStopColor,
peel off base,
peeloff,
peeloff gel,
red nails,
rose gold,
rosso,
semipermanente,
unghie
martedì 22 gennaio 2019
Red glitter peel off nail polish
Hello there!
As you know I was recently contacted by Born Pretty Store to review some more products for you guys.
If you're not familiar with Born Pretty Store, they're an online store and they offer beauty and nail art supplies. The store offers inexpensive items and free worldwide shipping with no minimum purchase required. I love Born Pretty and have been buying their products for years.
Today I would like to share with you my first impression on their brand new peel off nail polishes.
The colour I picked is Winter Light BP-FV04 # 44292 . Is is a beautful cool toned red with delicate holo glitter. I really like this shade, is delicatete and elegant.
What makes this polish special is the fact that it is a peel off polish, It is means that this is a water-based nail polishes that can be peeled off. You just have to gently loosen the edges, and they come off in one go.
I love this kind of polishes because you do not need acetone for removal you can switch colour very easily and match your outfit, moreover you won't get the acetone smell around your house anymore.
These kind of polishes have no smell and dry fast, you don't need acetone to remove it so it is gentle to the nails.
As far as I can say my first impressions of the formula are positive, it is a little less liquid than normal polish, is more like a gel and it quite easy to apply on the nail, it is a little bit sheer but since it has glitters the effect is beautiful. You need two or three coats for full opacity.
The peel off formula is great for glitters, with normal polishes glitters are a nightmare to take off , with a peel off formula is super fast and easy!
I can't say about how long it will lasts and how it peels off, these are just my first impressions, I will update you soon about these matters.
venerdì 2 marzo 2018
Cherry blosson and red bird nail art!
Hello there!
Today I am going to review some water decals from Born Pretty Store.
The company was very kind to let me select some products to try. I really love water decals because they are very easy and fast to use and e result is stunning. You will easily get compliments for your nails from everybody who notice them.
This time I've chosen an elegant oriental and vibrant design.
You can find it here .
There are many others patterns available, I am sure you will find a pattern you like.
If you decide to give this product a try please don't forget to use my coupon code, it will give you another 10% off: RASX31 on www.bornprettystore.com
The application is very easy.
The waterdecals are protected by a transparent sheet. You can select the size and the design you want, cut it with a scissor. Don't forget to remove the plastic sheet. Cut out the section of decals, and let it soak in room temperature water for about 20-30 seconds, slide the decals off the paper backing with tweezers and place on the nails with the white or nude base coat
The instructions suggest to place it on the nail and blow dry. The last step is to secure it with clear nail polish. In my case with a matte top coat.
The pattern is number 1594. I think it is very beautiful, it has flowers and blossoms in a pink and red shade, some others in beige. It reminds of an early oriental spring of the cherry blossom season in Japan. There is also a red bird that I decided to place on the ring finger.
I think this kind of waterdecals work best on a light base. I used a sheer white cream colour.
On thumb and pinkie I used a matt red with a bit of shimmer. (I personally mixed this shade ans I am very pleased with how it tuned out)!
Etichette:
bornprettystore,
chinese pattern,
coffin nails,
flower pattern,
japanese blosson,
nail art,
nail art idea,
nail decals,
red nails,
water decal 1594
martedì 2 febbraio 2016
Valentine chevron nail art!
Hello!
It's me!
Valentine's day is just around the corner so I decided to do something love-inspired.
If you don't have time you can go for a classic red/burgundy nail polish but wanted to enrich it with some details.
For this nail art I used a chevron nail striping tape Born Pretty Store sent me.
The tape roll is self-adhesive and the strip is divided in 3 parts. You can use all of them for different results.
I find it so clever that it comes in rolls, it is different from others nail vinyls, you can trim the lenght you want and minimize any waste. you can select small pieces for your pinky or longer ones if you have long nails and want to use it vertically.
the product is very vesatile because you can use it as a sticker, you can apply it directly on the nail and seal it with clear top coat. You can use it also as a vinyls or stencil as i did in this nail art.
Tutorial:
Start by painting all of your nails with a burgundy polish. Make sure you leave it dry completely.
Take the nail chevron tape and apply it on the nail. (I applied some pieces sidelong on my index, one on the middle and three on the thumb).
Take a pink and a black nail polish and using a ake up sponge dab onto the nail on the top of the vinyls. In this way you can create a soft degrade.
Remove the vinyls with some tweezers while the polish is still wet.
As last step I painted some small hearts with a dotting tool.
As you can see the nail vinyls worked perfectly, the nail paint didn't smudge too much and the effect was great.
You can choose between 5 colours: gold, silver, blue, white, black, red.
Check their site
http://www.bornprettystore.com/chevron-nail-striping-tape-colorful-nail-tape-line-stickers-lines-p-23383.html
You can use my coupon code at check out to get 10% off RASX31 on www.bornprettystore.com
Write me a comment if you ever tried something similar!
Thanks for reading.
Laura
Etichette:
blogs,
burgundy nais,
chevron nail art,
chevron tape nails,
easy nail tutorials,
laura's pills,
nail review,
red nails,
stiletto nails,
valentine nail art
Iscriviti a:
Post (Atom)