LaurasPills

LaurasPills
Visualizzazione post con etichetta fashion blogger. Mostra tutti i post

mercoledì 16 gennaio 2019

The best black stamping polish!


Hello!
Let's go on with our stamping polishes quest!
Now it is the time to show you a passepartout: a black stamping polish!

One of the biggest tips out there for successfully mastering the art of stamping is to invest in top quality nail stamping polish.
The general rule is if the polish is thick and can be applied with almost full-coverage in one coat, it’ll probably work well as a nail stamping polish.
Having a good black stamping polish can unlock you the doors of the heaven of nail stamping. It is a colour that you can use almost over any colour and it perfect for advanced stamping technique because it creates the perfect outlines for any coloured design.
For this reason the stamping polish you choose has to be perfect.


As you can see from this picture this nail polish is excellent, long-lasting, chip-resistant with supersaturated colour pigments. 
It is from Born Pretty Store called Throne BP-WN03 # 42857 . It has an excellent consistency. You will get one cute bottle that has the capacity of approx. 6ml.


This is the third colour I try from this collection from Born Pretty Store and I think they are the best stamping polishes I tired so far, The lines are perfect.

For this shade I wanted a modern and geometric design. I used this plate number BPL-027.  The plate has tons of beautiful designs that are perfect for lead lighting, laying over gradients, reverse stamping and more! I highly suggest this plate.


mercoledì 11 luglio 2018

Set of clear false nails!

Hello!
A few posts ago I shared with you my dirty little secret about nails:
I sometimes use false nails.
I used to have perfect and strong nails but for medical reasons my natural nails became brittle, thin, and awful. I don't want to stop doing nail art so I am always happy to try new set of false nails to find the perfect shape for me.

If you are a 90s kid like me you probably remember the first branded press on nails on the market, they were tragic and not so easy to wear, not natural looking at all.
False nails have come such a long way and they became the perfect compromise between beautiful and comfortable.

I have received this set of 600 nails to review from the online shop www.beautybigbang.com
They came in a bag that contains 600 nails in 10 different sizes from 0 to 9. Nails are divided by sizes and you will have extra nails in size 4 and 5 because I think they are the most common sizes. The size range is perfect and you will have 10 sizes to choose from so you can find the artificial nail that is the closest to the size of your natural nail.


You can even choose a colour:
 - transparent if you like to paint them with sheer nail polish or want to try a french manicure or french nailart.
- natural a sheer, milky white beige, the perfect base for light or nude colours
- white if you need a base for nail art or want a fast and easy nails-to-go


I went for the transparent ones this time because I thought they were more versatile.
The shape is a nice oval not too short and not too long, it can be easly shaped with scrissors or a file, the nails are quite flexible at the base and a bit more strong at the point.
I personally like false nails that are flexible enought to adjust to the curve of the natural nail. 

How to apply:
you can decide to paint the nails after or before wearing them. It's up to you!
When you're ready to glue the nail in place, cover the back of the artificial nail with the  glue and cover the top of your natural nail with glue. Be sure you cover each surface completely with glue or you will be able to see air pockets through the false nails after you've applied them. Hold the artificial nail on top of your nail for 5 seconds and it's glued.

This is how they look with nail polish and nailart


martedì 20 giugno 2017

Buttons for nail polish!

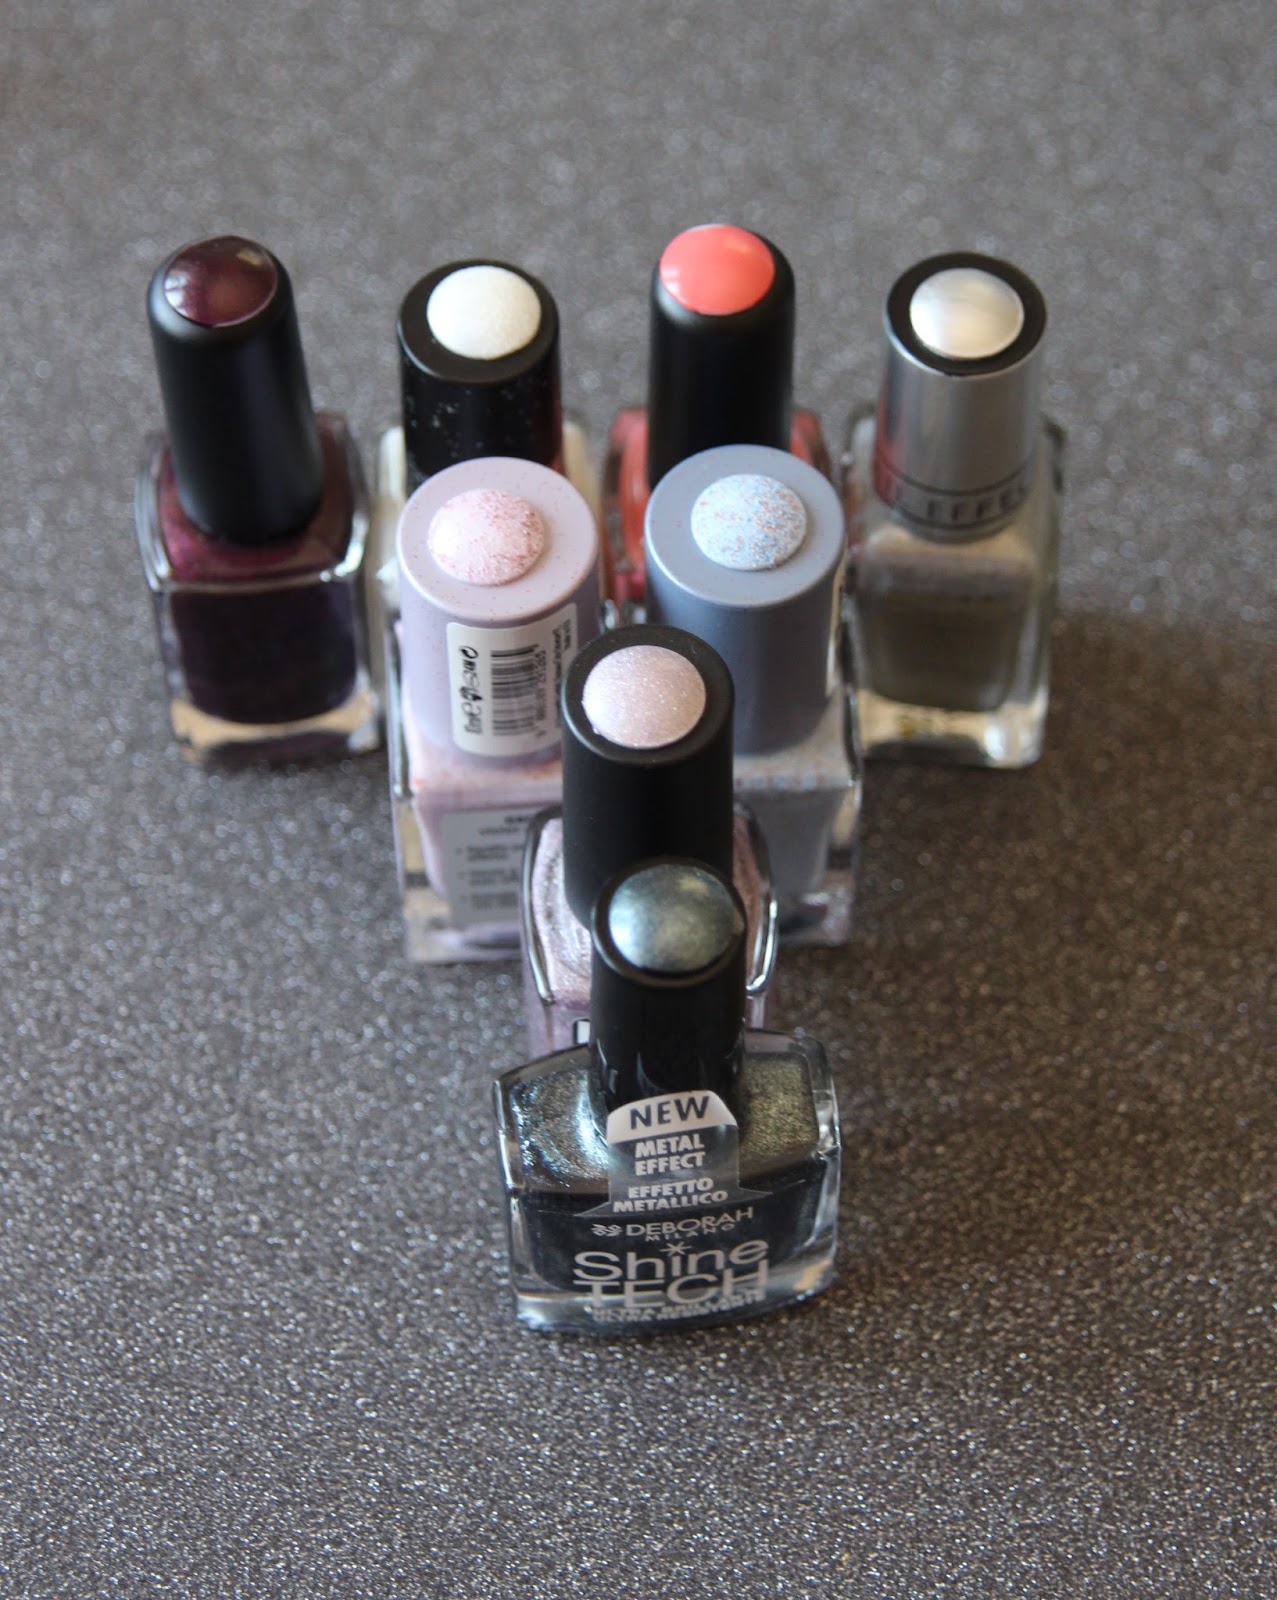
These are some silicone buttons that can be used on nail polish bottle's caps. The main purpose is to be able to find the color that you need quickly.
These are meant to be used with gel polishes which normally don't have sheer bottles.
I used them with regular polishes because I have a big collection that I store in drawers or boxes and I find useful to check all colours in a single glance.


This is the link where you can buy them, 1.99 for 25 pcs is a very good deal.

http://www.bornprettystore.com/10pcs-born-pretty-colour-buttons-polish-color-display-white-silicone-adhesive-paster-p-39376.html

These buttons are very easy to use, you paint each one with the polish you like and then apply them directly on the top of the cap, you don't need glue, each button is self adhesive.
Remember to paint the edges of the silicone button, in this way you will prevent the color to peel or crack.  Be very gently when you apply it.
Here is a small video where I show how I applied it.


Look  how  the section with the buttons looks tidy and nice!