Hello!
I have recently received a pr package full of Born Pretty Store new polishes.
They are all from the Neon collection.
The first shade I would like to show you is a bright green.
The colour is very saturated and pigmented. The formula allows you to make opaque and clean images when you transfer them on nails.
It can be used as a normal polish or as a stamping polish.
The colour is very vibrant under natural light and it is even better under uv light. If you are planning a night out on the dancefloor these polishes are a must!
For this nail art I used two colour fron this collection, the green and the yellow.
I mixed them on the plate and then I stamped on the white base.
For stamping I used this stamping plate, I thought that this plate would be perfect for these colours.
I picked the designs that looked like an abstract painting. I thought that a Neon Pollock could be the perfect stile for showing these shades.
The plate is stamping plate L079 Harunouta id code #46675
You can get a 10% discount at @bornprettyofficial using my code RASX31
Another glow in the dark nailart with the nail polish I have made diy with the luminous powder from Beauty Big Bang.
At first I wanted to create some lightning in the night but the final resul was similar to some radioactive or monster nails! :-) I don't know it turn out different form was I imagined in my mind.
I think this look would be perfect for Halloween.
The item Id is SKU: J2103-3A The site has a free shipping worldwide, they also make very nice offers too and, if you need some extra help, you can use my discound code LAURA for 10% off on your order. Il codice di identificazione del prodotto è : SKU: J2103-3A Il sito ha le spese di spedizioni gratis in tutto il mondo e spesso ci sono offerte convenienti e se avete bisogno di un incentivo extra c'è il mio codice di sconto LAURA per avere il 10% su qualsiasi prodotto.
you already know that I have a special love for glow in the dark items
I have been looking for glow in the dark nail art supplies that not only were luminous in the dark but had colours too and finally I found them on Beauty Big Bang online store. The company sells many glow luminous powders in many colours, you can choose between
12 colours. I picked a light blue colour.
This product comes in a plastic bag.
Remember that each of these powder is like a battery that charges and discharge at the same time. They constantly need charging to keep glowing. Natural or Artificial light is the main source of charge. The glow effect lasts a few minutes. This product can be used on just about anything you can think of from slime, candle making, diy project, paintings, etc.
Ciao a tutti,
come saprete già ho una passione speciale per gli oggetti che si illuminano al buio.
Da molto tempo sto cercando dei prodotti che non solo sia luminosi al buio ma che abbiano anche una tonalità di colore accesa, e finalmente li ho trovati sul negozio online di Beauty Big Bang.
Questo brand ha in vendita delle polveri che si illuminano al buio, si può scegliere tra ben 12 colori. Io ho scelto un blu chiaro.
Il prodotto è confezionato in una bustina di plastica.
Ricordate che ognuna di queste polveri si deve ricaricare come se fosse una batteria che si carica e scarica allo stesso tempo. Hanno bisogno di costante ricarica per continuare a splendere. La luce artificiale e naturale è la principale fonte di carica. L'effetto luminoso dura qualche minuto. Questo prodotto può essere usato non solo sulle unghie ma anche per progetti fai da te, dallo slime alla creazione di candele, pittura etc..
The item Id is SKU: J2103-3A
The site has a free shipping worldwide, they also make very nice offers too and, if you need some extra help, you can use my discound code LAURA for 10% off on your order.
Il codice di identificazione del prodotto è : SKU: J2103-3A
Il sito ha le spese di spedizioni gratis in tutto il mondo e spesso ci sono offerte convenienti e se avete bisogno di un incentivo extra c'è il mio codice di sconto LAURA per avere il 10% su qualsiasi prodotto.
You can use this powder in many ways you can directly apply it on nails, over a wet base of nail polish or mix it to acrilyc or nail polish.
I decided to create my own glow in the dark nail polish. The process is very simple. You can use any bottle of clear nail polish. In this case I used a matte top coat from Kiko.
Using a coloured polish is not advised because the polish pigment will cover the luminous power and it will not glow as much.
I cut and corner of the powder bag to make a small opening and I carefully poured it in the nail polish bottle. The last step is to close the cap thitghly turn and shake the nail polish to even the mix. You can even mix it with a toothpick.
Potere usare questa polvere in molti modi: potete applicarla direttamente sulle unghie sopra uno strato di smalto non asciutto o mischiarlo ad acrilico o smalto. Ho deciso di creare il mio smalto glow in the dark. Il processo è molto semplice e intuitivo. Potete usare qualsiasi smalto trasparente. In questo caso ho usato uno smalto opaco della marca italian Kiko. Non è raccomandato usare uno smalto colorato per questa operazione perché il pigmento dello smalto coprirà il potere luminoso della polvere e non brillerà molto al buio. Ho tagliato il bordo di un angolo della bustina in plastica per creare una piccola apertura, ho versato la polvere nella boccetta di smalto. L'ultimo passaggio è quello di chiudere il tappo e girare e scuotere la boccetta per miscelare il composto. Potete aiutarvi con uno stuzzicadenti se necessario.
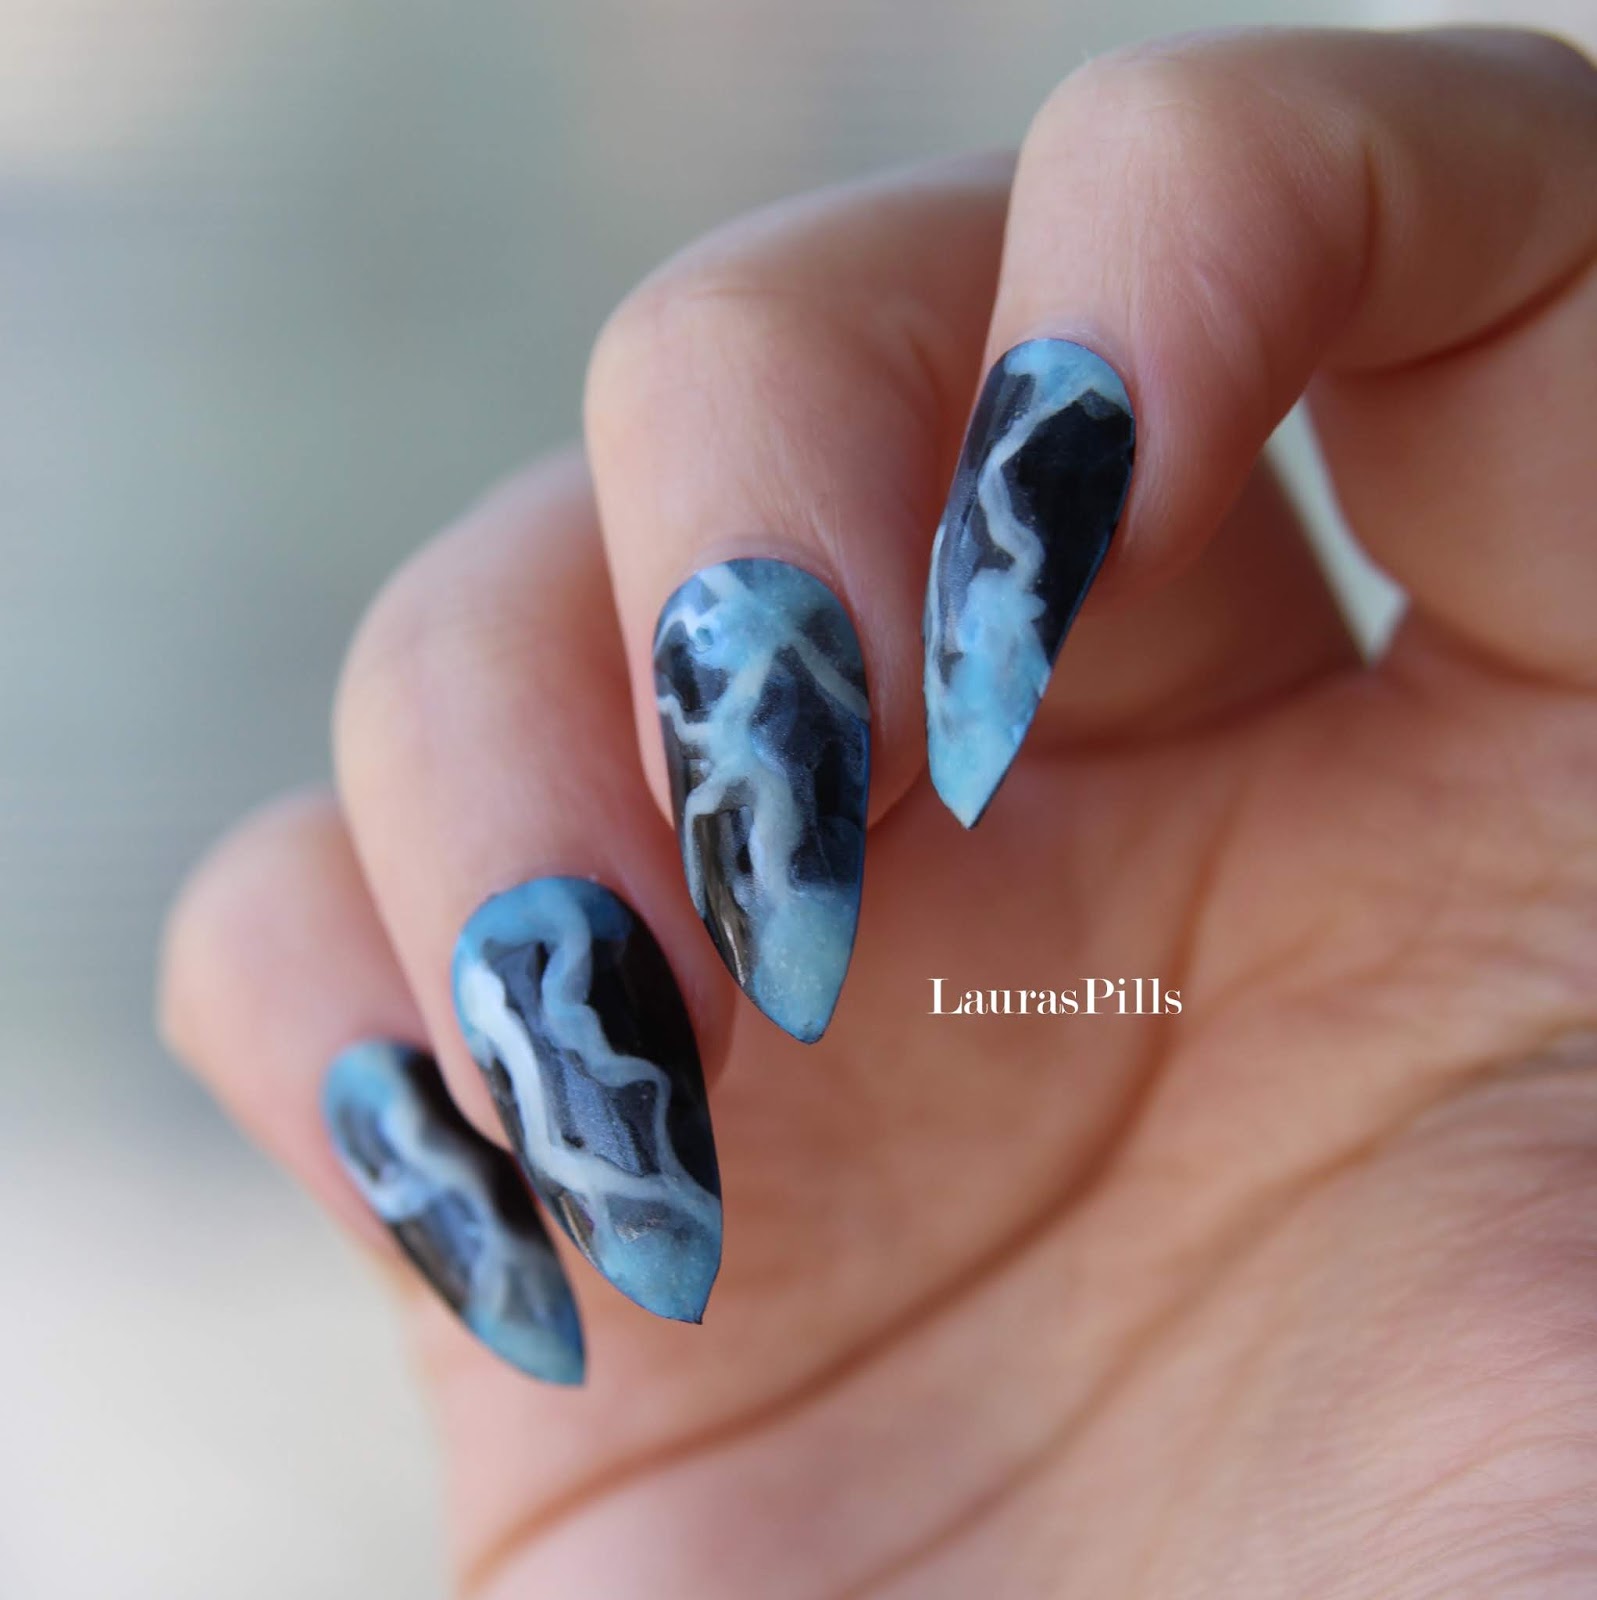
I wanted to create something special with this product, so I decided to go for a watercolor/smoke effect on a black base. I gradually added layers of thin acrylic paint in white and different shades of blue, I added a coat of glow in the dark polish only in the center part of the nail.
.
Per mostrarvi questo prodotto volevo creare qualcosa di speciale sulle unghie, per questo ho deciso di creare un effetto acquarello/fumo su una base nera. Ho aggiunto gradualmente strati di colore acrilico diluito in differenti tonalità di blu, dal più chiaro al medio scuro. E infine ho coperto la parte centrale dell'unghia con lo smalto.
Hello!
Are you ready for something new?
I hope so!
Today I would like to show a product that I received from the Company Beauty Big Bang.
Here is a nail art and a nail product that will make your nail glow with no effort!
Ciao! Siete pronti per qualcosa di diverso? Lo spero! Oggi vorrei mostrarvi una nailart e un prodotto che mi ha mandato il negozio online Beauty big Bang. Una nail art ed un prodotto che faranno letteralmente illuminare le vostre unghie!
These are some glow in the dark star shaped nail sequins. Aren't they cute??
They currently are on discount and you can have them for 1.62 euro. The product comes in a nice jar with approx. 1g of sequins. The sequins are really thin so you will have a many many stars to decorate your nails!
Si tratta di alcune paillette a forma di stella. Non sono carinissime? In questo momento sono in sconto e potranno essere vostre per 1.62 euro. Sono contenute in un piccolo contenitore che contiene approssimativamente un grammo di prodotto. Queste stelline sono molto fine e vi assicuro che il barattolo ne contiene molte e che dureranno per molte manicure.
This is how they look in darkness or semi-darkness.
All you have to do is to to hold it under a light for few seconds and then it will glow in the dark (the effect won't last forever, but you can recharge it under a light again and again).
In questa foto vi mostro come sono al buio o in penombra. Tutto quello che dovete fare è direzionarle verso una luce (naturale o artificiale) per qualche secondo poi spegnere la luce e loro brilleranno al buio (l'effetto non durerà molto ma potrete ricaricarle sotto una luce infinite volte).
If you want you can find this product at this link:
Don't forget to use my coupon code: LAURA for 10% discount.
Potete trovare questo prodotto qui: https://www.beautybigbang.com/products/glow-in-dark-nail-sequins-round-heart-star-thin-paillette-luminous-nail-glitter Non Dimeticate di usare il codice LAURA per avere lo sconto del 10%.
I wanted to create something special with these nails sequins. I was really inspired by some pictures I found on pinterest and polyvore of some star lighting:
Volevo creare qualcosa di speciale con questo prodotto. Mi sono lasciata ispirare da alcune fotografie trovate su pinterest e polyvore che raffigurano alcuni fili di luci a stella.
So I end up creating this:
Here is a step by step tutorial to show you how I did it: Ecco un tutorial step by step in cui vi mostro come l'ho realizzata:
Step 1: Start with a black nail polish. Step 1: Partire da una base nera.
2. Dip a fan brush in a dark blue shade and gently swipe it across the nail.. You don't have to be precise. 2. Intingere un pennello a ventaglio in un colore blu profondo e passarlo sull'unghia. Non si deve esser troppo precisi.
3. With a striping brush, draw two lines across the nail in a silver shade (these will be the strings for the star lights). 3. Con uno striping brush disegnare due linee con un colore argentato (questi saranno i fili per le luci a forma di stella).
4. With a wax pencil or a dotting tool apply the star sequins over a wet nail polish. 4. Con una matita di cera o uno strumento per dotting applicare le stelline su uno strano di smalto trasparente non ancora asciutto.
5. If you want you can trace over the strings with a glow in the dark nail polish. I used Essence glow in the dark top coat. 5. Se si vuole si può ripassare il disegno dei fili argento con uno smalto glow in the dark. Io ho usato il top coat di Essence.
Here is a small video to show you the effect in the dark!!!
Qui c'è un piccolo video che vi mostra l'effetto al buio
You can also use these sequins to decorate your phone case, stationey and even for body art!
I did a small jar full of stars! I glued some sequins on a silver wire!
Potete usare queste pailletes per decorare custodie per cellulari, cartoleria e persino per body art! Io ho realizzato un piccolo barattolino pieno di stelline. Ho incollato alcune stelle su un filo argentato!


